
If you’ve ever wanted to master fall-off-the-bone ribs without the guesswork, the 3-2-1 method is your ticket. This tried-and-true smoking technique gets its name from the simple timeline it follows: three hours of slow smoking to build flavor and bark, two hours wrapped in foil to lock in moisture and tenderness, and a final hour unwrapped to finish with a perfect glaze or caramelized sauce. The result is consistent, competition-style ribs that even first-time smokers can pull off with confidence.
Prepping the Ribs
Before the ribs ever hit the smoker, a little preparation goes a long way. Start by choosing the cut: baby back ribs tend to cook a bit faster and are leaner, while spareribs are meatier and deliver a richer bite. No matter which you pick, be sure to remove the thin membrane from the back of the rack — this barrier can prevent smoke and seasoning from penetrating the meat.
Next, coat the ribs generously with your favorite dry rub. Whether it’s a simple mix of salt, pepper, and paprika or a more complex blend with garlic, cayenne, and brown sugar, the rub helps build flavor and bark during the smoking process. Let the ribs rest while you fire up the smoker so the seasoning can settle in.
Setting Up the Smoker
Temperature and wood choice make all the difference in smoked ribs. Aim to hold your smoker steady at 225°F. Remember that low and slow is the key to tenderness. For wood, fruit varieties like apple and cherry lend a mild sweetness, while hickory and oak create a bolder, smokier flavor. (Some pitmasters even mix woods to balance depth and aroma.) Make sure your smoker is producing thin, blue smoke rather than thick white clouds; this ensures a clean flavor instead of a bitter bite.
“Stage 3”: Building Smoke and Bark
The first three hours are all about laying down flavor and creating that coveted bark on the outside of the ribs. Place the racks directly on the smoker grates, bone side down, and let the low heat and wood smoke do the work. Resist the temptation to open the lid too often. During this stage, the rub will begin to darken and form a flavorful crust while the meat slowly absorbs smoke. By the end of the three hours, the ribs should have a rich mahogany color and a noticeable smoky aroma.
“Stage 2”: Wrapping for Tenderness
After the initial smoke, it’s time to wrap the ribs tightly in foil or butcher paper for the next two hours. This step steams the meat and helps break down connective tissue, creating the fall-off-the-bone texture many barbecue fans crave. Before sealing, add a splash of liquid like apple juice, beer, or even a mix of honey and butter. These additions lock in moisture and infuse the ribs with an extra layer of sweetness or depth. Keep the smoker at 225°F and let the foil do its magic while the ribs tenderize.
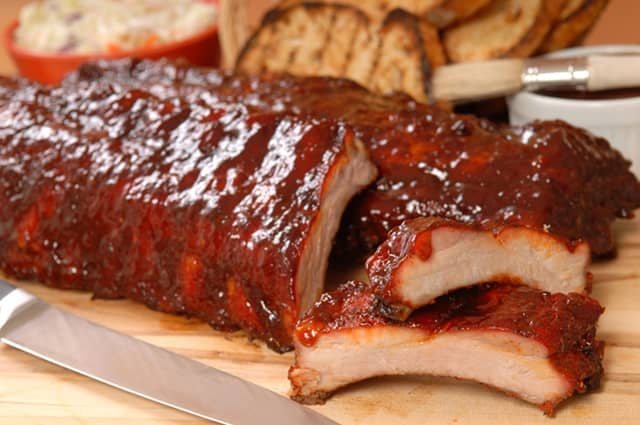
“Stage 1”: Saucing and Finishing
For the final hour, carefully unwrap the ribs and place them back on the smoker. This stage firms up the bark and allows you to finish with sauce if desired. Brush on your favorite barbecue sauce for a sticky, caramelized coating, or leave them dry if you prefer a more traditional, smoke-forward flavor. Either way, keep a close eye on the ribs during this last stretch, as the sugars in sauce can burn if the heat spikes! When the hour is up, you’ll have ribs that balance smoky bark, tender meat, and just the right amount of glaze. The 3-2-1 method really works!